
UIlicious is a simple yet powerful tool for automating user journeys with modern web applications. We help you find and fix the errors in user journeys before your users do. At UIlicious, we do more than test user journeys; we can also integrate with many different CI/CD tools, so every new commit points out bugs before your users discover them.
This guide will introduce you to what CI/CD Integration is and why we need it. We will also introduce the value of how adding UIlicious to your CI/CD pipeline can deliver the functionality you deserve - automated test results and an improved end-user experience overall!
Table of Contents:
What is CI/CD?
Let’s take a look at what CI/CD stands for. “CI” means Continuous Integration, and Continuous Integration is the process of constantly merging or “integrating” your code into a common, shared code base used by other individuals or teams. Often, individuals or groups in an organization will keep their code separate and then merge into a common code base.
“CD” means Continuous Delivery or Continuous Deployment, and it can be more complex than CI since how your CD may look depending on how your automation workflow is set up. Continuous Delivery means quickly preparing and integrating your finished code into the production environment for the next step: deployment.
Continuous Deployment differs from Continuous Delivery because quality code that has passed rigorous testing and guidelines is automatically sent into the production environment.
CI/CD is more than a set of practices, though. It is a philosophy that allows developers and operators to create and push out high-quality, reliable code confidently throughout the CI/CD workflow. Automation is key to the CI/CD process.
CI/CD is also a common practice used in DevOps. Developer Operations, often known as DevOps, is a set of philosophies, practices, and cultures with the objective of quickly developing and delivering high-quality software.
Why do we need CI/CD?
To understand why CI/CD is such an important process in workflows, we need to know what it was like before CI/CD became a common practice in today’s industry.
Before CI/CD existed, we had “release days”. Release days were planned days of launching or deploying a new feature or product to the users. Often, there was a lack of transparency and processes in the workflow from development to production, leading to institutional bottlenecks in the Software Development Lifecycle (SDLC). Contributing factors such as lack of insight shared between business and technology teams and poorly managed processes caused release days to be stressful and unsuccessful. Because of these factors, this led to a fear of deployment into production and inspired the saying, “Don’t Deploy on Fridays”. There was a large focus on specific systems and tools rather than processes and workflows.
Picture yourself as the average developer or engineer, constantly fearing fixing one thing and something else breaking in a different place. There was also tons of manual labor put into building and maintaining what you wrote. You would even have to worry about production standing still when you went on vacation because you were often the sole guardian of the scripts you wrote for these builds.
Automation was not yet an integral part of SDLC, so there was a heavy focus on writing “hard-to-maintain” bash scripts that only one developer knew how to execute. This situation often left the whole team in the dark and helpless when this one developer went on vacation or left the team.
There was a heavy focus on writing scripts or repeatable code; these scripts were not put through rigorous testing.
There was still a chance that build issues and failures would be discovered on the release day. As you can imagine, this can be pretty stressful for developers, their team, and the product’s end-users.
As a response, CI/CD was created to test every new build to catch bugs and flaws before “release day.” CI/CD made processes and flows more transparent and accessible to the regular developer and the rest of their team.
What Does an Effective CI/CD Pipeline Look Like
CI/CD can do more than just automatically linting your code and deploying it to testing and production environments. CI/CD, when implemented well, can reduce downtime by encouraging test-driven deployments and providing a transparent workflow for all teams involved so that when teammates have questions, they are able to gain a basic understanding of what is happening during the pipeline.
One of the most important features of CI/CD is that the developer gets immediate feedback instead of finding out later down the pipeline (where significant changes have already occurred). The small steps developers take early in the CI/CD pipeline reduce the time overall during the work from development to production.
Automated testing is a key contributor to making the CI/CD pipeline effective and efficient and, overall, allows companies to adapt to customer desires by deploying much faster. Through automated testing, developers can also receive fast and early feedback that will reveal useful warnings and error messages about code. As a result, developers can roll back changes before they ever get to production. Automated testing plays a role in helping developers provide a smooth user experience.
One of the first steps you would need to take is to learn that automation can occur at any stage of the CI/CD pipeline. Define the goals that you want to achieve with your team and how automation can be the way to achieve those goals. If your team decides that your goal is to reduce testing times and integrate code faster, then test automation would be a solution that you would focus on implementing in your CI/CD pipeline.
With automated testing, you and your team can discover build failures early before they are released into production, strengthen code quality, deliver features far more quickly to your users, and develop a more stable system overall.
Types of CI/CD Tools that UIlicious Integrates With:
GitHub Action and GitLab
We know that the CI/CD pipeline allows us to continuously integrate and deploy quality code easier; let’s look at some CI/CD tools.
CI/CD tools, both open-source and paid versions, can make it easier for you to automate software development workflow, but there are many to choose from, ranging in capabilities.
Here are two of the more well-known CI/CD tools for 2022 listed below.
GitHub Actions
GitHub Actions is a free CI/CD tool that you can use to automate your custom workflows in your GitHub public and private repositories. Using GitHub Actions makes it easier for you to deploy and test your code if your project is already on GitHub.
A workflow is a customizable and automated process. When we think of a workflow, we can break it down into four concepts: Events, Actions, Jobs, and Runners.
With GitHub Actions, creating and setting up your workflow through your configuration file, known as your YAML file, is simple. Each YAML file represents one workflow.
To trigger a workflow, an Event must occur. An event could be when a user creates or deletes a branch, forks a repository, or makes a repository.
An Action is described as the “smallest building block” of a workflow and is made of custom, repeatable code that makes up a step. When you combine actions, you create Jobs.
A GitHub Job is a collection of sequential steps (a step represents each action) executed on a server known as a Runner.
GitHub Actions currently supports Ubuntu, Windows Server, and macOS.
GitHub Actions is also free to the public.
To learn more about GitHub Actions, GitHub docs has excellent documentation on Understanding GitHub Actions.
GitLab
GitLab is a CI/CD tool that acts as the one-stop shop for your DevSecOps lifecycle, better known as Developer, Security, and Operations.
GitLab is similar to GitHub actions because they both use the concepts of Jobs and Workflows.
Unlike GitHub Actions, GitLab offers more in-depth features related to security, like DAST and Secret Detection. DAST searches for web application vulnerabilities, and Secret Detection can detect leaked secrets like passwords in your Git repositories.
GitLab currently offers support for several Linux-based and Debian distributions, and far more. Take a look at Supported Operating Systems to find out more.
Compared to GitHub Actions, GitLab offers a more extensive suite of products that may help your company in edge cases.
GitHub Actions | GitLab | |
|---|---|---|
Open-source | Yes | Yes |
Free vs Public Repositories | CI/CD not available for free private repos | CI/CD available to free and private repos |
Integrations | 600+ (View GitHub Marketplace) | 50+ (View GitLab Integrations) |
Free CI/CD Minutes | 2000 CI/CD minutes per month | 400 CI/CD minutes per month |
DevSecOps Support | Secrets feature Not as advanced as GitLab | SAST, Auditing, and more (View DevSecOps) |
Workflow Support | Better for simpler workflows | Better for more complex workflows |
Sign up for UI-licious now
UIlicious and CI/CD
How does UIlicious play a role in CI/CD workflow?
Currently, UIlicious users can use the CLI to integrate with their preferred CI/CD tool.
How to Build Sample Workflow with GitHub Actions & UIlicious
We’ll provide a quick GitHub Actions tutorial on how you can get set up UIlicious with the CI/CD tool.
Prerequisites:
To follow this tutorial, you will need an active GitHub account.
Step 1 – Head to GitHub
First, go to Github.com
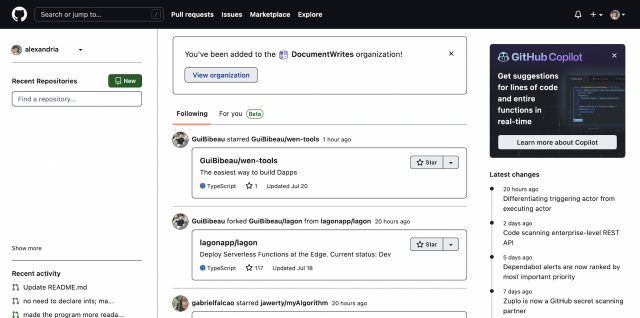
Then, head to your profile.
Step 2 – Click Repositories
If you have a repository that you would like to use, click the Repository.
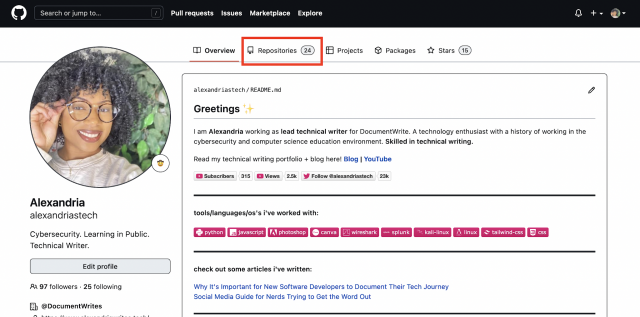
Otherwise, click "New" to Create a New Repository.

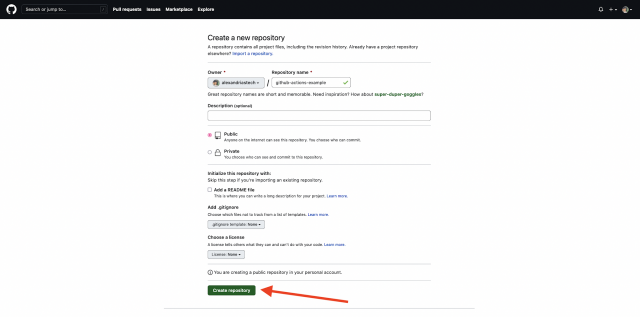
Then, fill out a Repository name.
Click the Create Repository button.
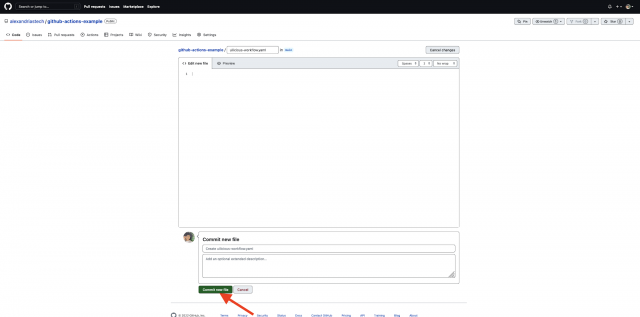
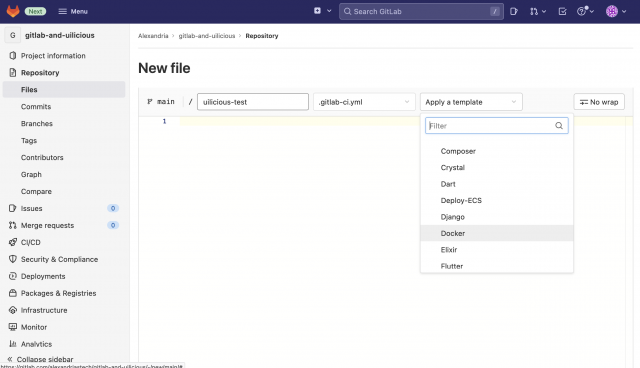
Step 3 – Create a new file under your repository
Next, click creating a new file so that we can get started making your yaml file.
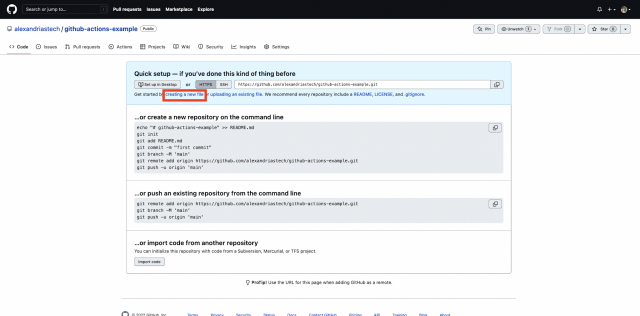
Name your example file, uilicious-workflow.yaml.
Then, click the Commit new file.
Step 4 – Edit the YAML file
So, now we are going to add an action to our YAML file so that we can run and execute our UIlicious tests as a part of our CI/CD workflow.
Copy and paste the following code:
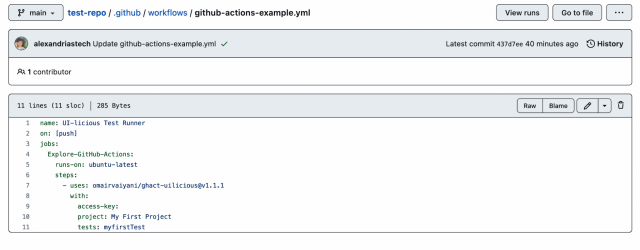
name: UI-licious Test Runner
on: [push]
jobs:
	Explore-GitHub-Actions:
		runs-on: ubuntu-latest
		steps:
		uses: omairvaiyani/[email protected]
		with:
			access-key: [REDACTED]
			project: My First Project
			tests: myfirstTest
To better understand what our workflow is doing, we need to take a look at the workflow syntax.
name
The name of our test is UI-licious Test Runner.
on:push
This line means that the test will run every time you push a commit to this repository.
jobs
On the third line, jobs, we will have our listed jobs that make up our workflow. In this example, we only have one job that is titled Explore-Github-Actions.
Under Explore-GitHub-Actions, we have requisites that require our job to run a specific way when the test is pushed.
runs-on: ubuntu-latest
First, it must run in Ubuntu.
steps:
This lets GitHub Actions know that we want to start performing a series of tasks known as steps.
uses: omairvaiyani/[email protected]To let our GitHub Action know where we will be getting our steps, we will reference a specific version of an action.
with:
This gives GitHub Actions more context on what information will be provided from UIlicious:
access-key: [REDACTED]
project: My First Project
tests: myfirstTest
These three lines of code represent the information pulled from UIlicious about the test that you would like to run during the workflow.
Note: The Access Key is provided by UIlicious and can be found in your Access Key section of your UIlicious account.
To learn more about UIlicious Actions, check out UIlicious Test Runner.
Step 5 – Github Actions Workflow for UIlicious Example
How to use GitLab & UIlicious
Using GitLab can be a complex journey, and by using this guide, you will learn how to use the GitLab platform to successfully set up a project, create a workflow, and run the workflow.
Prerequisites
To complete this tutorial, you can register for a GitHub account and connect with GitLab. Other options for logging in include a Google Account, Twitter Account, or Bitbucket account.
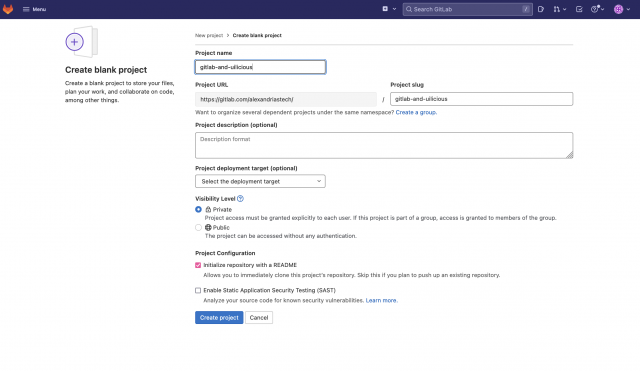
Step 1 — Create a Project
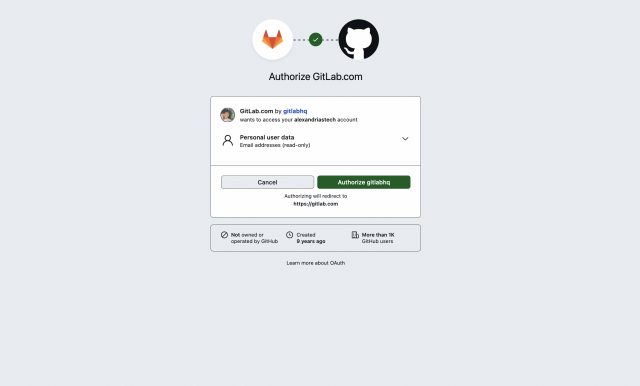
First, you will need to connect your GitHub account.
Click Authorize gitlabhq.
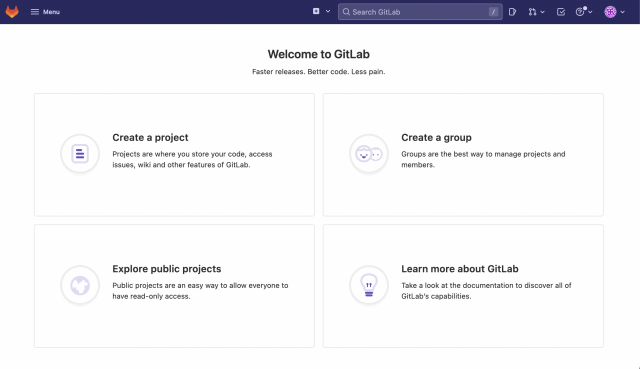
After connecting your account with GitLab, you should see a Welcome to GitLab page.
Next, click Create a project.
Then, title your Project name and click the Create project button.
Step 2 — Create a .gitlab-ci.yml file
We will need to create a new file that will be our configuration file, also known as a yml or YAML file.
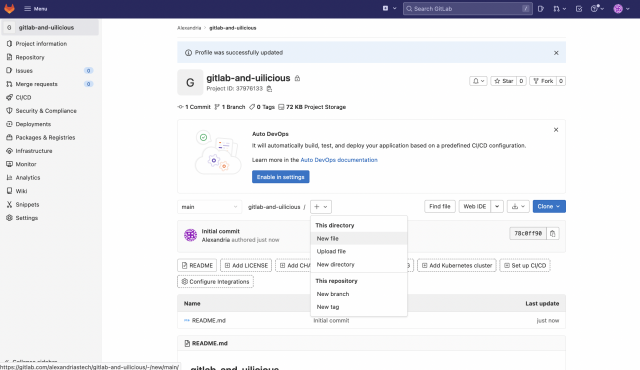
Next, name your yml file uilicious test and select .gitlab-ci.yml as the template type.
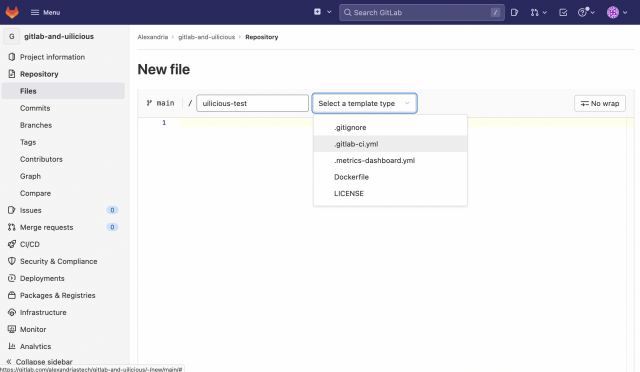
Then, choose Docker.
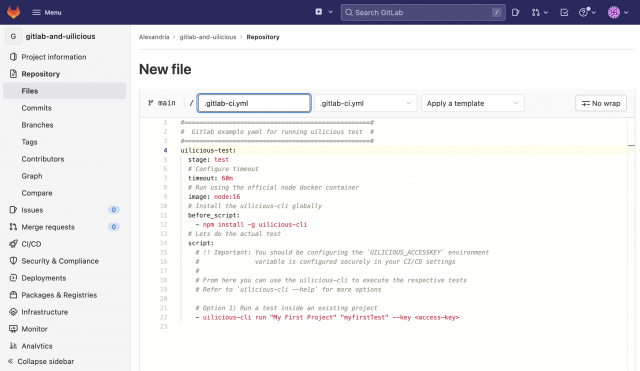
Step 3 — Write UIlicious Test
Delete the original code provided after clicking docker.
Next, copy and paste the code below into the GitLab editor.
#=================================================#
# Gitlab example yaml for running uilicious test #
#=================================================#
uilicious-test:
stage: test
# Configure timeout
timeout: 60m
# Run using the official node docker container
image: node:16
# Install the uilicious-cli globally
before_script:
- npm install -g uilicious-cli
# Lets do the actual test
script:
# !! Important: You should be configuring the `UILICIOUS_ACCESSKEY` envirnment
# variable is configured securely in your CI/CD settings
#
# From here you can use the uilicious-cli to execute the respective tests
# Refer to `uilicious-cli --help` for more options
# Option 1) Run a test inside an existing project
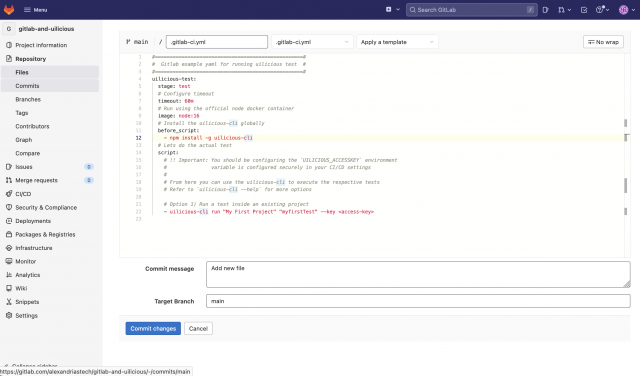
- uilicious-cli run "My First Project" "myfirstTest" --key <access-key>Your GitLab editor should look similar to the screenshot below.
Note: You will need to replace the <access-key> with your UIlicious access key.
Then, click the Commit changes button.
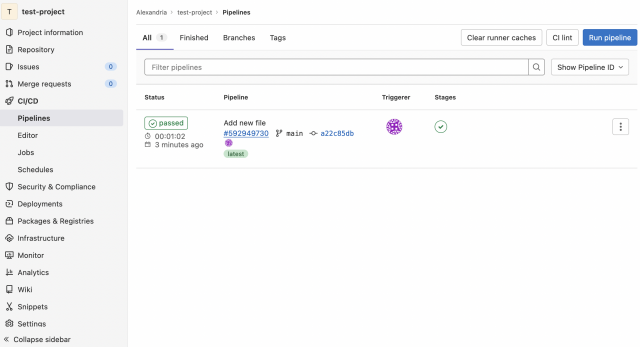
Once you have committed changes, you should eventually receive a success message to let you know that your pipeline has earned a status of passed.
Sign up for UI-licious now
Conclusion
After completing this guide, you’ve learned what CI/CD is and how important it is to testing, building, and deploying your automation workflow.
Different CI/CD tools can integrate into the CI/CD pipeline, and we’ve taught you the pros and cons of each, specifically GitHub Actions and GitLab. UIlicious helps you automate and test user journeys.
Learning how to integrate UIlicious with the three different CI/CD tools can help improve your UIlicious experience overall.